The concept: trying to paint a level with blood or paint (nearly the same thing, only the color is different) in Unity 3D.

First method: decals

Decals are simple sprites, repeated and drawn on top of other objects. They are usually used for visual enhancements of a scene more than for gameplay purposes.
Here’s an example of a decal for paint.
Paint decal
Using an existing script probably made by a Dexter fan (download and demo here) I was able to spawn decals in my level to stick paint everywhere.
Paint decal test
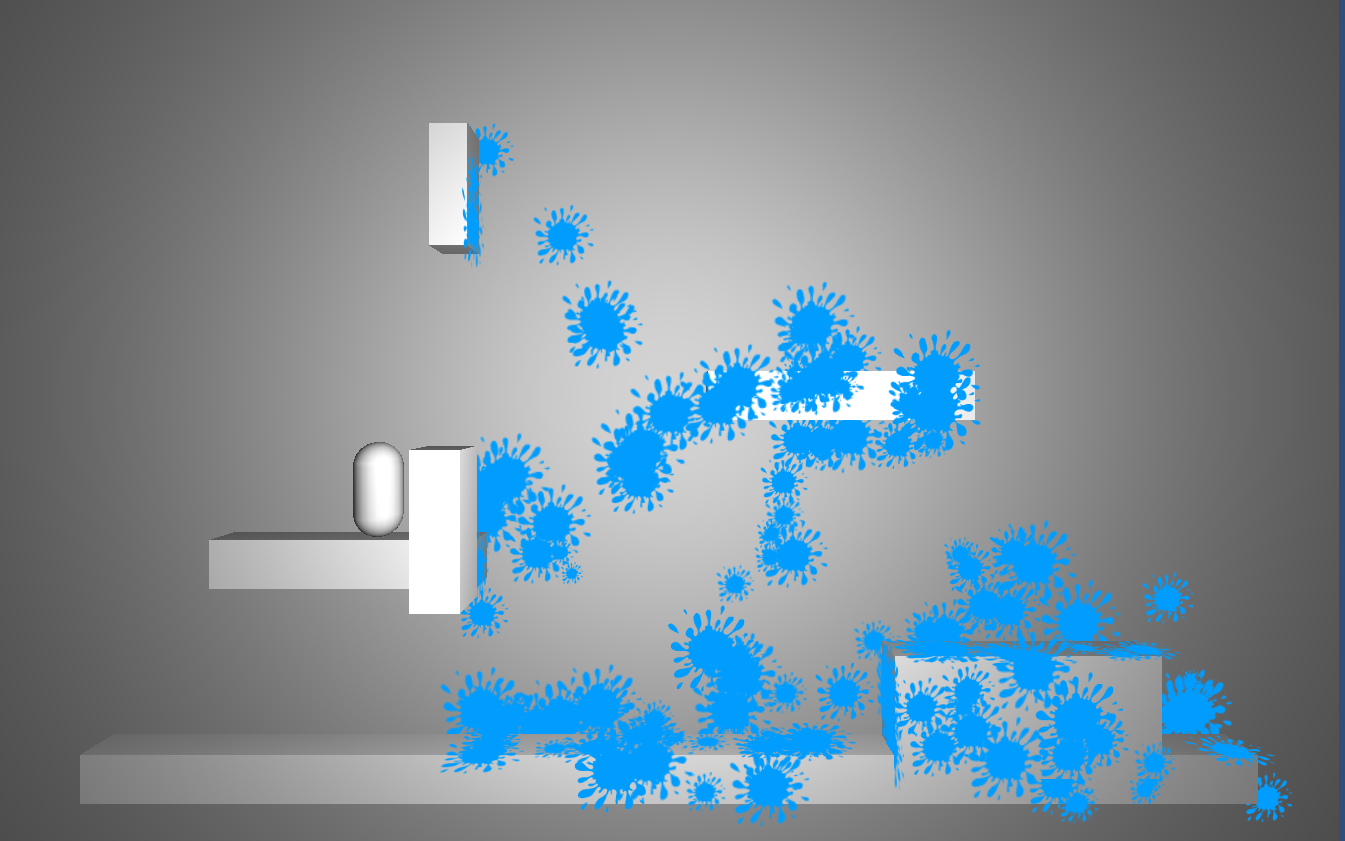
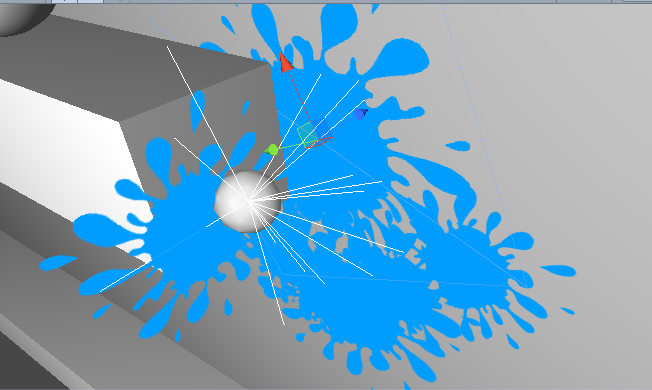
The splash algorithm from the original script linked above is quite smart. From a point in space it raycasts in random direction and print a decal when it hits something.
I added some debug features to visualize it.
Paint decal test visualization
To have a proper display of decals, I used a community script called BlendedDecal. It removes all glitches due to “Z-fighting”.
The decals itself was:
  • A quad
  • The texture above with alpha as transparency…
  • …texture that was on a BlendedDecal shader material
Nothing else. The fun part is when you add a rigidbody, you can have physics splash.
And here’s the script I used for painting. I put it online because the original script was in JavaScript so it may helps someone to have it done in C#.
using UnityEngine;
using System.Collections;
using System.Collections.Generic;
/// <summary>
/// Generate paint decals
/// </summary>
public class PainterScript : MonoBehaviour
{
public static PainterScript Instance;
/// <summary>
/// A single paint decal to instantiate
/// </summary>
public Transform PaintPrefab;
private int MinSplashs = 5;
private int MaxSplashs = 15;
private float SplashRange = 2f;
private float MinScale = 0.25f;
private float MaxScale = 2.5f;
// DEBUG
private bool mDrawDebug;
private Vector3 mHitPoint;
private List<Ray> mRaysDebug = new List<Ray>();
void Awake()
{
if (Instance != null) Debug.LogError("More than one Painter has been instanciated in this scene!");
Instance = this;
if (PaintPrefab == null) Debug.LogError("Missing Paint decal prefab!");
}
void Update()
{
// Check for a click
if (Input.GetMouseButtonDown(0))
{
// Raycast
Ray ray = Camera.main.ScreenPointToRay(Input.mousePosition);
RaycastHit hit;
if (Physics.Raycast(ray, out hit, Mathf.Infinity))
{
// Paint!
// Step back a little for a better effect (that's what "normal * x" is for)
Paint(hit.point + hit.normal * (SplashRange / 4f));
}
}
}
public void Paint(Vector3 location)
{
//DEBUG
mHitPoint = location;
mRaysDebug.Clear();
mDrawDebug = true;
int n = -1;
int drops = Random.Range(MinSplashs, MaxSplashs);
RaycastHit hit;
// Generate multiple decals in once
while (n <= drops)
{
n++;
// Get a random direction (beween -n and n for each vector component)
var fwd = transform.TransformDirection(Random.onUnitSphere * SplashRange);
mRaysDebug.Add(new Ray(location, fwd));
// Raycast around the position to splash everwhere we can
if (Physics.Raycast(location, fwd, out hit, SplashRange))
{
// Create a splash if we found a surface
var paintSplatter = GameObject.Instantiate(PaintPrefab,
hit.point,
// Rotation from the original sprite to the normal
// Prefab are currently oriented to z+ so we use the opposite
Quaternion.FromToRotation(Vector3.back, hit.normal)
) as Transform;
// Random scale
var scaler = Random.Range(MinScale, MaxScale);
paintSplatter.localScale = new Vector3(
paintSplatter.localScale.x * scaler,
paintSplatter.localScale.y * scaler,
paintSplatter.localScale.z
);
// Random rotation effect
var rater = Random.Range(0, 359);
paintSplatter.transform.RotateAround(hit.point, hit.normal, rater);
// TODO: What do we do here? We kill them after some sec?
Destroy(paintSplatter.gameObject, 25);
}
}
}
void OnDrawGizmos()
{
// DEBUG
if (mDrawDebug)
{
Gizmos.DrawSphere(mHitPoint, 0.2f);
foreach (var r in mRaysDebug)
{
Gizmos.DrawRay(r);
}
}
}
}
view rawPainterScript.cs hosted with ❤ by GitHub

Advantages:

  • Simple
  • It manipulates GameObjects
  • Nice splash algorithm

Drawbacks

  • What do we do of those game object? Destroy it after x seconds? Let them accumulate until it crashes?
  • As you can see of the screenshot above, your decals have to have a size that match where they are applied

The hard way: painting the texture

Unity allow to directly change the colour of a pixel on a texture.
You just have to use the SetPixel(s) method.
It’s a bit slow, but if you batch your modification you can optimize the paint.
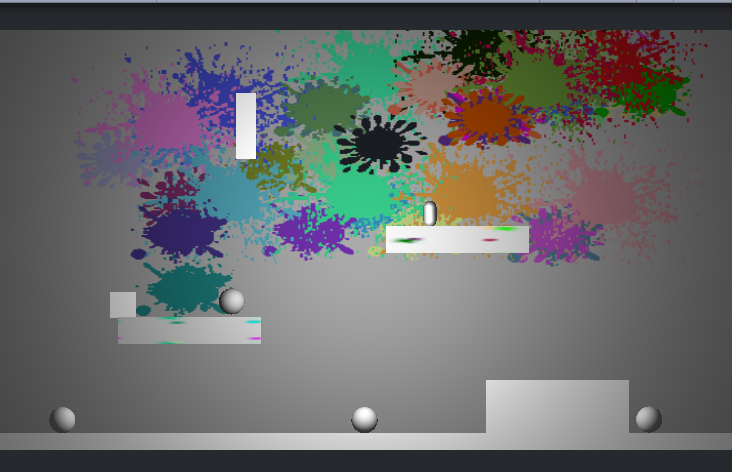
Drawing some random pixels is easy, so I thought it could be nice to use the previous decal as a model, a shape.
I also added a random roulette for dcals so it’s always the same that is used. Here’s what I got:
Texture blood test
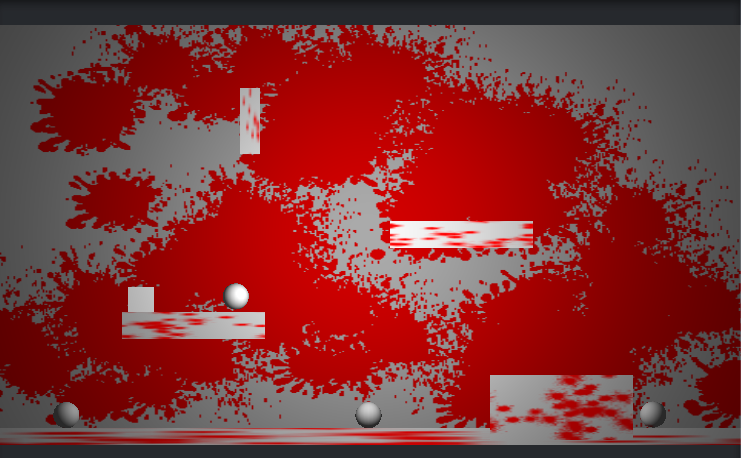
or the painting version, the same with a color change
Texture painting test
The wall behind is quite nice. But the painting on platforms clearly sucks. It’s all streched and small. I am not applying a ratio, so the texture is stretched but I’m doing as if it was not.
I mixed it with the previous splash algorithm so it’s raycasting everywhere to paint things.

Advantages:

  • No objects are created
  • Ingame permanent (but reseted at each launch)

Drawbacks

  • Performance: cause a small 0.1sec freeze
  • Paintable objects must have a texture AND a mesh collider (so you can get textureCoords for RaycastHit)
  • Complexity
  • You must perfectly understand texture. Not like me, trying to hack stuff.

0 comments:

Post a Comment

Pin ThisShare on TumblrShare on Google PlusEmail This
 
Top